
Top 4 software and how I use it in my workflow for Content Creation:
- Indomitable Traveller

- Mar 24, 2024
- 6 min read
CHAPTER 1
Adobe XD: Crafting Conceptual Foundations The Importance: Whatever we want to do or create should be well-planned and documented. Thus, mood boards, shot decks, setup sketches, and shooting schedules play an important role in my workflow. I have seen a lot of folks in the biz, show up straight in the shoot without a plan or any document that has the details of the plan for the shoot. This is not just an amateur move but also shows how much skin you put into the game. The Plan: Regardless of what your craft is every artist has to go through a tedious process; brainstorming. While planning and brainstorming, I prefer to use Adobe XD. Yes, I know what you have been thinking about how software that has been made completely for designing interactive user experiences, can be used as a tool for MoodBoard. I will explain. Let’s understand what is mood board and it's process first: A mood board is like a visual brainstorming tool that helps artists gather ideas, themes, colors, and textures for their projects. It's a collage of images, textures, colors, and sometimes even words or phrases that capture the overall mood or vibe they want to convey in their work.
For different artists, mood boards serve various purposes. For instance, for a photographer like me, a mood board helps in conceptualizing a photo shoot by collecting images that inspire the desired aesthetic or mood. Similarly, designers use mood boards to gather inspiration for their designs, whether it's for fashion, interior design, graphic design, or any other creative endeavor.
Overall, mood boards help artists organize their thoughts, spark creativity, and ensure that their final creations align with the vision they have in mind. It's like having a visual roadmap to guide the creative process. Plus, it's fun to curate and explore different ideas!

How I Integrate Adobe XD into My Content Creation Process: As a content creator, integrating Adobe XD into my workflow has revolutionized the way I approach projects. Whether I'm conceptualizing a new video, photoshoot, or digital interface, Adobe XD serves as my go-to tool for visualizing and conceptualizing. In every project, the first thing I do is shoot up the XD, grab the inspirations from the net, and put them on the artboards. I will give you an example of my workflow. Imagine, I am working on a film project. I will use mood boards to map out my lighting and camera setups for each scene in the project. These moodboards are like my visual blueprints, filled with images that inspire me and convey the mood and tone I want to achieve.
For lighting setups, I gather examples of different lighting styles—whether it's intense chiaroscuro for dramatic scenes, soft and diffused lighting for romance, or vibrant colors for high-energy moments. Each image helps me visualize the type of lighting I need to create to evoke specific emotions and enhance the storytelling.
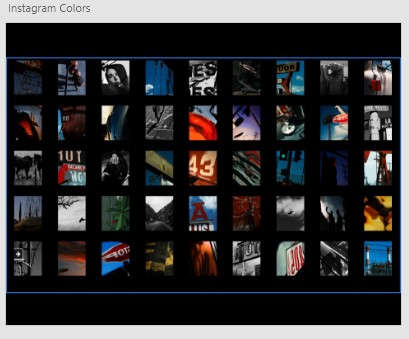
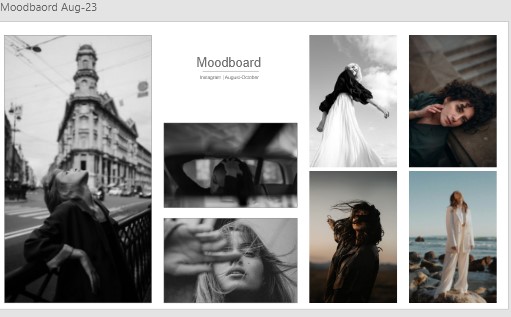
Similarly, for camera setups, I curate examples of various angles, movements, and compositions. From dynamic tracking shots for action sequences to steady static shots for dialogue scenes, these images guide me in crafting visually compelling cinematography that aligns with the director's vision. Here are a few snapshots of my mood boards


CHAPTER 2
Adobe Photoshop: Elevating Visual Artistry
The Ultimate Tool: Adobe Photoshop occupies a pivotal role in my creative journey, serving as the ultimate tool for refining and perfecting visual compositions. Photoshop remains the undisputed leader in image editing software, empowering creatives to unleash their full potential and bring their visions to life. With its extensive array of tools and capabilities, Photoshop offers unparalleled flexibility for manipulating images, enhancing photographs, and creating stunning visual compositions. Whether it's retouching imperfections, compositing elements, or unleashing imaginative edits, Photoshop empowers me to transcend the boundaries of conventional imagery. Its expansive array of features and unrivaled versatility make it an indispensable asset for achieving artistic brilliance and pushing the boundaries of visual storytelling.
Adobe Photoshop for Image Editing
From basic adjustments like cropping and resizing to advanced techniques such as layer masking and retouching, Adobe Photoshop provides a comprehensive toolkit for image editing.
Its non-destructive editing capabilities allow for precise adjustments without compromising image quality, while features like content-aware fill, generative fill, and smart objects streamline complex tasks and expedite my workflow.
How I Integrate Adobe Photoshop into My Content Creation Process:


In addition to traditional photo editing techniques like exposure correction and color adjustments, I mostly use Photoshop to enhance images and add artistic flair. Techniques such as selective color grading, camera raw filter, and content-aware fill enable me to imbue my work with personality and emotion, transforming ordinary photos into extraordinary works of art. Though I also do use Lightroom, other than grading and cropping, lightroom is limited. Photoshop is much better at removing objects from the photos. Also, with the introduction of generative fill now it has become more easier for me to remove or replace an object in a photo. After capturing the photo, it goes through several processes to get that ultimate cinematic look that I want. One of the processes includes layer masking, which is not available in Lightroom. So, once I do the basic color correction, I bring the photo to Photoshop for the final edit. Color grading, layer masking, content-aware, spot removals, and adding blur are a few of the techniques and tools that I use in Photoshop to enhance the final image.
Also, if I need to add text, I have to use Photoshop.
Creative Uses of Adobe Photoshop in Content Creation Projects:
Beyond its role as a photo editing tool, Adobe Photoshop finds application across a diverse range of content creation projects. From designing graphics for social media posts to creating custom illustrations and digital artwork, Photoshop's versatility makes it indispensable for modern creatives. Its seamless integration with other Adobe Creative Cloud apps further enhances its utility, enabling seamless collaboration and asset sharing across different stages of the creative process.
CHAPTER 3
Adobe Premiere Pro: Mastering the Art of Video Editing
I'm not particularly keen on using mobile applications, which many people rely on nowadays for creating social media content. Instead, I prefer professional editing suites like Final Cut Pro, Davinci, or Adobe Premiere Pro. All three are renowned for their video editing capabilities, although their interfaces vary significantly. Personally, I favor Adobe Premiere Pro due to its comprehensive suite of editing tools, advanced AI features, and seamless integration with other Adobe Creative Cloud apps. Whether it's editing an Instagram story, reel, or a complete vlog video, Premiere Pro offers the flexibility and precision required to realize your vision. From basic edits like trimming and cutting to more advanced techniques such as color grading and audio mixing, Adobe Premiere Pro provides a wide range of tools for enhancing video content.
Editing Techniques : When it comes to editing techniques, I believe that mastering just 50% of Premiere Pro's features can result in compelling video content. Many vloggers, including renowned YouTubers, who either work alone or have small teams, often utilize only 30-40% of the software's capabilities. Yet, they still manage to create outstanding content and achieve their dreams.
Before delving into the software, it's essential to understand the "what" and "how" of your content creation. Once you have clarity on what you want to create, whether it's a vlog, cinematic video, or a short story, figuring out how to do it becomes more manageable, even for beginners.
Remember, starting with mediocrity can lead to stagnation. It's crucial to seek inspiration and ambition before diving into editing software. While a flashy video may lose its appeal over time, a compelling, timeless video can continue to generate revenue regardless of its age.
Incorporating Adobe Premiere Pro into My Workflow for Storytelling
Incorporating Adobe Premiere Pro into my storytelling workflow has been instrumental in producing content for various platforms, including YouTube, Instagram, client projects, and promotional videos. My video workflow consists of four straightforward steps:
Storyboarding & Shot selection
When selecting shots, I used to shoot extensively, resulting in a lot of unused footage. Over time, I've learned to shoot more selectively, sticking closely to the storyboard and avoiding unnecessary footage. Imagine using only 10 footage while you have shot 90 footage.
After importing the selected shots into Premiere Pro, I begin by adjusting colors and frame rates and arranging clips on the timeline according to the storyboard or audio cues after selecting the shots, I import them into the project in Premiere Pro. The very next thing I do is first modify the clips as per color and fps. If I have a storyboard and script, I start cropping the videos and placing them on timelines. If I do not have a script and it's for Instagram, then I start to look for Audio and place the footage according to the audio.
Sound mixing
Sound is often overlooked but crucial in videos, contributing significantly to the overall experience. Finding the right audio, rather than just following trends, is essential. I dedicate considerable time to selecting and mixing audio, ensuring it complements the visuals perfectly. Also, don't rush to export your video once you have put the music on the timeline. Add SFX, and ambiance, and adjust gain for each audio before you export it. Additionally, I adjust the volume levels to ensure a balanced audio experience, especially for social media platforms like Instagram.
The first or rough cut
The rough cut stage involves assembling the selected shots and audio into a coherent sequence, excluding color grading and adding effects. This phase sets the foundation for the final edit, allowing for refinement and polishing before exporting the video.
For those of you who don't know about the first cut, let me explain. In a video editing workflow, a "first cut" or "rough cut" refers to the initial assembly of footage and sequences to create a preliminary version of the video. It's typically the first stage in the editing process after the raw footage has been imported into the editing software.
During the first cut, I select the best takes and clips them together in a sequential order based on the script or storyboard. This initial arrangement serves as a rough outline of the final video, providing a basic structure for further refinement. The first cut is often rough and unpolished, with basic transitions, minimal effects, and temporary audio. Its primary purpose is to establish the overall pacing, flow, and narrative structure of the video, allowing me to assess the content and make initial creative decisions.
Once the first cut is complete, I proceed to refine and enhance the video through subsequent rounds of editing and color grading to achieve the desired final video.
Color Grade & Export
Color grading is the vast world so I will keep it short and crisp here.
In my workflow color grading plays a vital role in fine-tuning the visual aesthetic of the footage. It involves adjusting various parameters such as white balance, exposure, contrast, saturation, and color balance to achieve the desired look and feel of the video. Premiere Pro offers a range of tools and effects specifically designed for color grading, including Lumetri Color, which provides comprehensive controls for color correction and creative color manipulation. Additionally, I use my LUTs to apply predefined color grades or create custom looks.
Once the color grading process is complete and the video looks just right, the next step is exporting. In Premiere Pro, the export process is highly customizable, allowing editors to specify parameters such as resolution, codec, bitrate, and file format to meet the requirements of the intended distribution platform or audience. For my Instagram reels, I keep the bitrate to 30.
CHAPTER 4
Adobe Illustrator: Creating Stunning Artworks
Understanding Adobe Illustrator's Role in Creating Print Artworks As a vector-based design tool, Adobe Illustrator is ideally suited for creating print artwork with crisp lines, sharp edges, and scalable dimensions. Whether you're designing business cards, brochures, or posters, Illustrator's precision drawing tools, shape manipulation features, and typography controls enable you to create professional-quality print materials that stand out from the crowd.
Designing Logos, Icons, Merchandise, and Illustrations with Adobe Illustrator
From iconic logos and brand identities to custom icons, merchandise designs, and intricate illustrations, Adobe Illustrator offers limitless possibilities for creative expression. Its vector-based approach allows for infinite scalability without loss of quality, making it the preferred choice for designing assets that need to maintain their visual integrity across different sizes and formats.
How Adobe Illustrator Complements Other Adobe Tools in My Content Creation Process In my content creation process, Adobe Illustrator plays a crucial role in complementing other Adobe tools like Photoshop and InDesign. Whether I'm creating custom graphics for web and digital media, designing assets for print publications, or illustrating concepts for presentations and infographics, Illustrator's seamless integration with other Creative Cloud apps ensures a smooth and efficient workflow. By leveraging its powerful features and collaborative capabilities, I can bring my creative visions to life precisely and confidently.
Here are some snapshots of my recent projects:


Comments